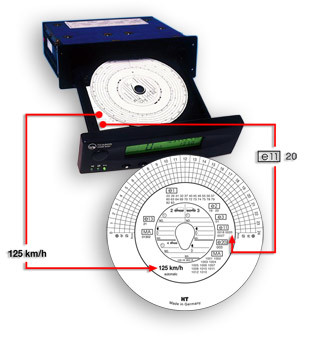
Identify the speed range and number of revolutions (if applicable). Check that the approval number of your tachograph is identical to the number indicated on the reverse side of the chart.
How to select the proper type of diagram chart for your tachograph!
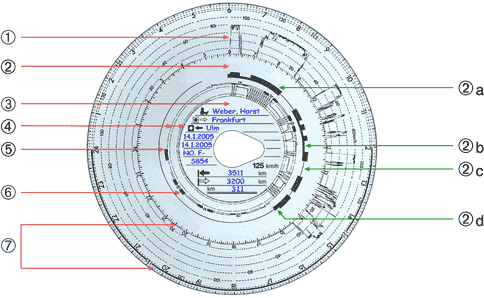
Front side of the chart
(1) speed recording
(2) duty recording
(3) centre field (see separate picture)
(4) distance recording
(5) 0.00 o’clock mark for electronic recording
(6) indication of driver’s work modes
(7) time scales
(2a) driving time
(2b) other work
(2c) break
(2d) working time
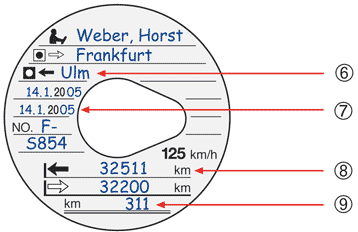
Centre field of the chart:
Before the chart is placed into the tachograph the centre field should be completed with the following information:
(1) driver’s name
(2) place of start of work
(3) starting date (upper line)
(4) vehicle registration number
(5) start odometer reading
On finishing the day’s work the centre field has to be completed with the following information:
(6) place of finish of work
(7) finishing date (lower line)
(8) end odometer reading (arrow to the left)
(9) difference between start and end odometer reading
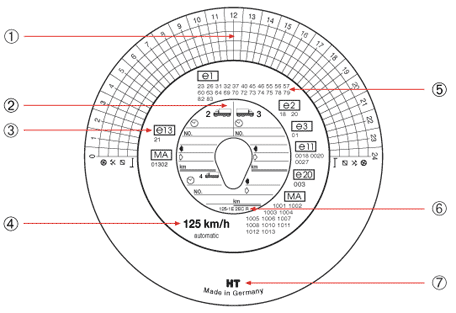
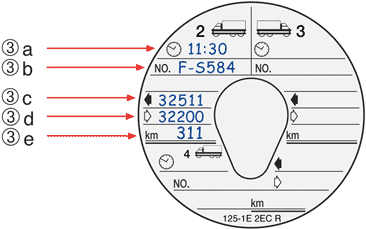
Reverse side of the diagram chart
In the centre field of the reverse side you can record up to 3 vehicle changes during one shift.
(1) space for hand written entries of duties within 24 hours
(2) centre field to be completed in writing by driver (see fig. below)
(3) EC approval No. of the chart
(4) upper speed limit of measuring range in km/h
(5) approval Nos. of EC and non-EC tachographs
(6) part No. of chart
(7) company logo
The following must be completed for each vehicle change:
(3a) time of vehicle change
(3b) registration number of the new vehicle
(3c) end odometer reading
(3d) start odometer reading
(3e) difference between start and end odometer reading